OS ENV Setup
Instructions for users who have access to a debug device
Windows
Install Firefox
Download firefox v59 before installing make sure the previous version of firefox is uninstalled.
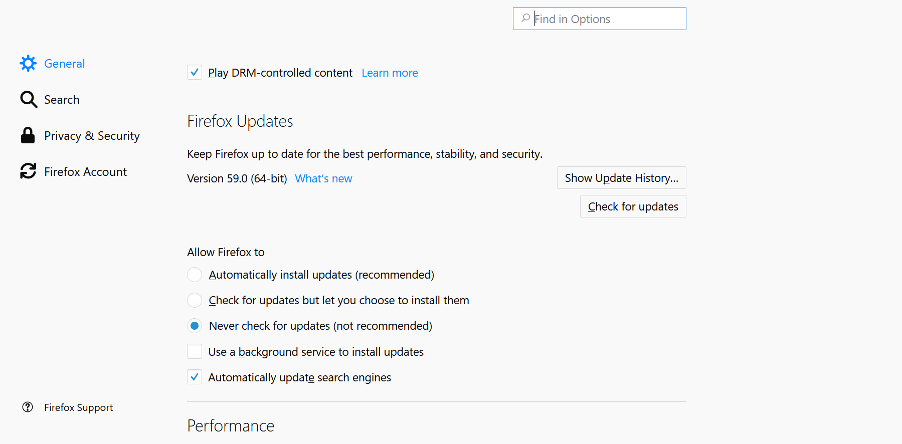
Disabling auto updates once Firefox is installed. (Menu -> options -> general)

Install ADB
Visit this Google page to Download the ADB ZIP file for Windows.
Unzip the folder on your Windows C Drive (C:\platform-tools).
Connecting to Device
Connect your device with the laptop using USB cable. Make sure it is in debug mode.
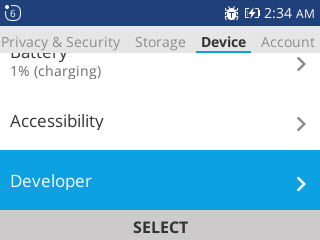
Open the Settings app and follow this flow:
Device > Developer > Debugger > ADB and DevTools


Open command prompt of your laptop.
Run
$ cd /path/to/extracted/folder/
- Run
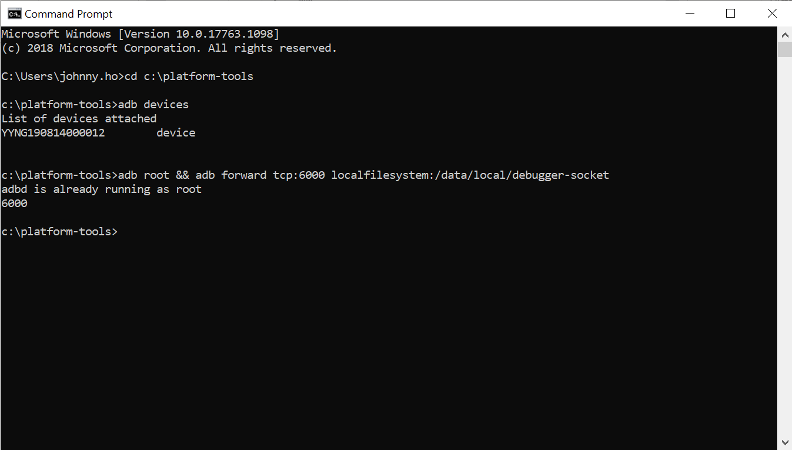
$ adb devices
You should see your device has been detected.
- Run
$ adb root
$ adb forward tcp:6000 localfilesystem:/data/local/debugger-socket
This is to establish a path between your device and the laptop.

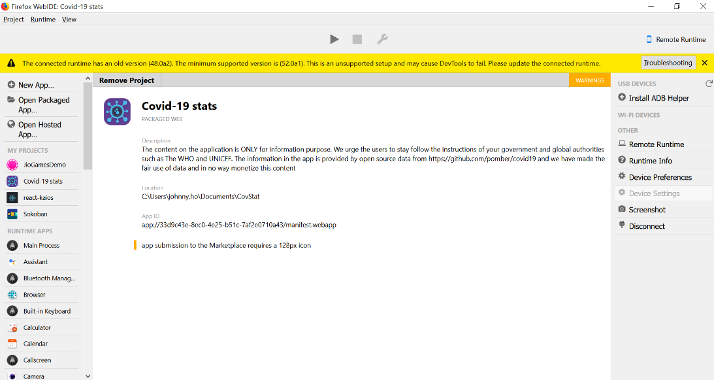
Open Firefox Web IDE. Click on “Remote Runtime” on the right side. Press “OK”. A warning about old connected runtime version would pop up. Ignore it.
You are ready to install an app on your device
Install your first app
- Open Firefox Web IDE and make sure you have connected your device and executed the commands
$ adb root
$ adb forward tcp:6000 localfilesystem:/data/local/debugger-socket
If you have packaged app stored on your laptop, click “Open Packaged App” on the left side and select your project folder.
Your project folder must have a manifest.webapp file. Otherwise, the IDE cannot open your app. Check here to create manifest.webapp file.
After selecting your app, you should be able to see your app.

Install the app on your device with RUN button and Debugger button to debug top center of WebIDE.
Install the app.
Then, you are available to use the basic tools in the web IDE for development, such as Inspector, Console, JavaScript Debugger, Style Editor, Scratchpad.
macOS
Install ADB
You can follow this link install ADB tools for macOS.
Install and Run app
Download firefox v59
open terminal and run these commands
$ ruby -e "$(curl -fsSL https://raw.githubusercontent.com/Homebrew/install/master/install)"
$ brew cask install android-platform-tools
connect device and run
adb devices
You should see 1 device connected.
disconnect from internet, install downloaded firefox, go to prefferences and disable updates (download or check): Connect to internet
Go to about:config, turn the following preferences: xpinstall.signatures.required = false, extensions.legacy.enabled = true
Go to this link and download install adb helper
In Firefox Tools > Add on > Extension and add the downloaded adb_helper.xpi file
In firefox go to Tools > Web Developer > WebIDE
On right should see "USB Devices" and should have one device
On the left have "Open Packaged App" - click it, and choose some app (a folder)
Middle top click the play button... that's it, app should be on your phone and you should notice it.
Linux
Install Firefox
You will need to get the Firefox v59 or older version for KaiOS implementations, to download these versions, you can get them through Mozilla FTP.
After downloading the chosen version, you must unpack the package with the command:
$ tar jxvf firefox-*.tar.bz2 -C /opt
Create a shortcut to facilitate program execution
$ sudo ln -sf /opt/firefox/firefox /usr/bin/firefox
Setting WebIDE
Firefox's WebIDE is a necessary development tool to inspect your app, as well as see the console, debugger, and others.
- Follow the instructions in WebIDE to setup and learn more about WebIDE.
Installing make(Optional)
Make is a necessary tool to run KaiOS. Execute the following commands on the terminal to install it.
$ wget http://ftp.us.debian.org/debian/pool/main/m/make-dfsg/make_3.81-8.2_amd64.deb
$ sudo dpkg -i make_3.81-8.2_amd64.deb
$ sudo apt-mark hold make
Setting the required architectures(Optional)
$ sudo dpkg --add-architecture i386
$ sudo dpkg --add-architecture amd64
Installing dependencies(Optional)
There are some necessary dependencies to complete your environment for running Gaia. Execute the command below on your terminal and all these dependencies will be installed.
$ sudo apt install --no-install-recommends autoconf2.13 bison bzip2 ccache curl flex gawk gcc g++ g++-multilib git lib32ncurses5-dev lib32z1-dev libgconf2-dev zlib1g:amd64 zlib1g-dev:amd64 zlib1g:i386 zlib1g-dev:i386 libgl1-mesa-dev libx11-dev make zip lzop libxml2-utils openjdk-8-jdk nodejs unzip python
Setting ccache(Optional)
$ ccache -M 10G
Installing ADB and fastboot
$ sudo apt install android-tools-adb android-tools-fastboot
Setting USB access
$ wget -S -O - https://raw.githubusercontent.com/cm-b2g/B2G/1230463/tools/51-android.rules | sudo tee >/dev/null /etc/udev/rules.d/51-android.rules; sudo udevadm control --reload-rules
Plug the device in your computer using a USB cable
Use the command
$ lsusb
on the terminal to get the Vendor ID. Example of a result: Bus 001 Device 014: ID 22b8:2e76 Motorola PCS ===> vendor ID is 22b8
Log in as root and edit this file: /etc/udev/rules.d/51-android.rules
In the file above put a new line using the vendor ID that you got before. Example: SUBSYSTEM=="usb", ATTR{idVendor}=="22b8", MODE="0666", GROUP="plugdev"
Now execute:
$ sudo chmod a+r /etc/udev/rules.d/51-android.rules
- Create the following file in your HOME dir (not as root)
$ nano ~/.android/adb_usb.ini
Put the value of vendor ID on this file using hex format. Example: 0x22b8, where 22b8 is the vendor ID that you got before.
Use the command 'adb devices' on the terminal to list all devices connected on your PC. Your device should be listed and is ready to receive Gaia apps or use it on WebIDE.
Connection Errors
For more information about the ADB connection fail error see this link